Calculate Quantities Tools
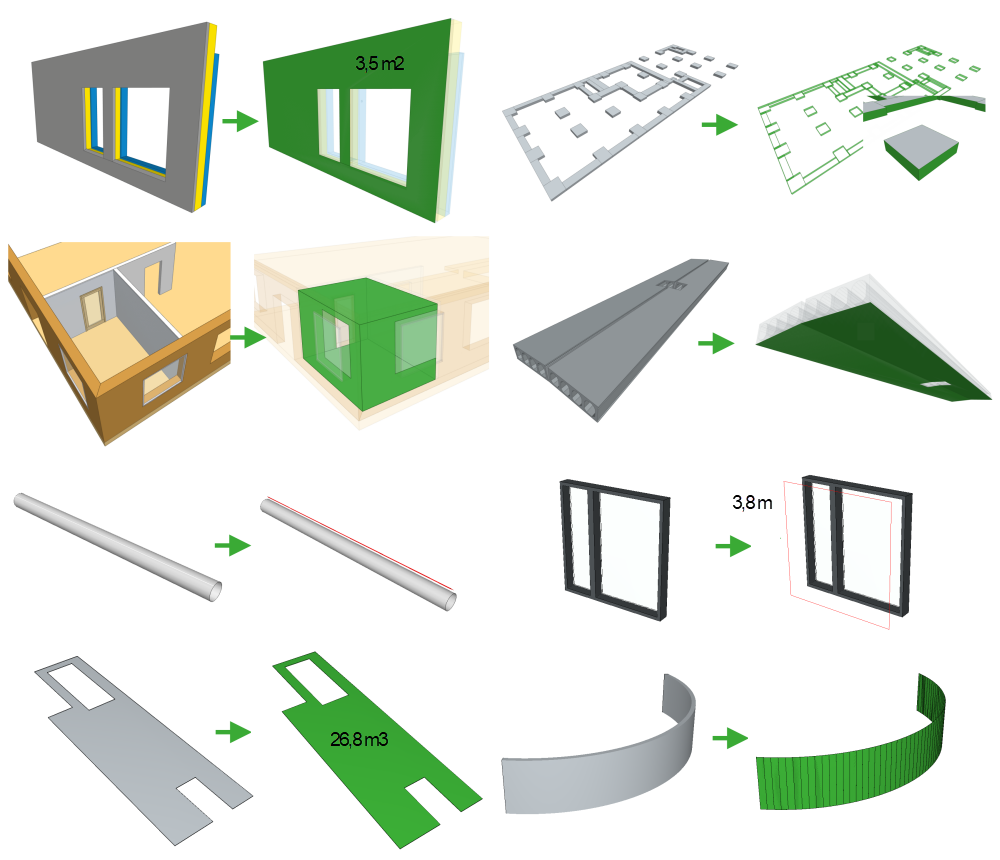
Calculate Quantities tools calculate quantities based on the object geometry. It calculates dimensions, perimeters, different kinds of areas, and volumes, even areas for space coverings.
There are all together 6 different tools, each for specific kinds of quantities: Volumes, Surface Areas, Dimensions, Shadow Quantities, Space Surface Areas and Openings.
Because the calculation is done based on the geometry, the quantities are always calculated with the same logic, no matter which model author tool was used for creating the model. This makes the quantities consistent and stardardized.
Quantities are the basis for basically everything in construction. This is why mastering the Calculating Quantities tool is one of the key skills you can have.
Learning to Use
Calculate Quantities tools are designed for professionals based on feedback from the quantity surveys during the last ten years. In professional quantity surveying there’s all sort of situations you need to manage. Because of this, there isn’t just one dimension or one area quantity in the tools. This makes the learning curve a little bit steeper. On the other hand, you can handle wide range of quantity calculation challenges with it, in a professional way.
What is cool about the tools, is that you can visualize the quantities as derived objects. This is an easy and visual way to learn the quantities and to make sure, that you are using the right quantity for your specific use case.
Common Configurations
All six tools share a common set of configuration. Let’s first go through them, and then the additional configurations for each tool.
Name of Target Group
Select Object Class, Group, Group Category, Top Most or Part level objects. The calculation is done only to the objects included in your selection. There is a special option All, which applies the tool to all the objects in the model, but we don’t recommend using it. When doing QTO, you should know, which objects should have which quantities. Not all need all quantities. Properly managing your calculations will keep the model clean from unnecessary data. With the very big models selecting the relevant set of objects for each quantity, will also increase performance.
Quantities and Properties
Here you define the quantities you want to calculate and the properties where you want to assign the result. Each tool has their own set of quantities. Check the more detailed descriptions of each quantity here.
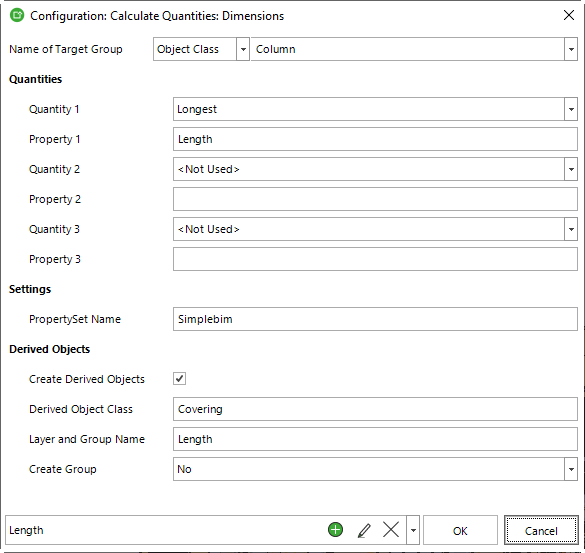
For example if you want to calculate volume. Run the Calculate Quantities: Volumes tool. Choose ‘Volume Net’ from the Quantity dropdown. And set for example ‘My Volume’ to the Property field. Then the configuration would look like this:
Quantity 1=Volume Net
Property 1=My Volume
If the property already exists in the model for the target objects, then the result is set to that property. If the property does not exist, then it is automatically created. This is a very convenient way to do calculations. Just make sure, that you have defined the right Property Set Name. See more details below.
The Properties are used both for the original objects and the derived objects.
Please check the detailed description of each quantity below.
Property Set Name
The property set name is used, when the tool automatically creates properties for you. This happens, when the tool cannot find the Properties of the model.
This is not a mistake. It is actually very convenient to let the tool create the properties. This way you can skip the extra step of adding the property separately to the model. However, in order for Simplebim to export the Properties to IFC, it needs to know, which property set it belongs to. This is just how IFC works. Use the Property Set Name to define the property set. This can be basically anything. Probably some property set of your own. The one your company uses or some BIM exchange requirement has been defined.
Create Derived Objects
This might be the coolest feature we have ever implemented in Simplebim. Create Derived Objects allows you to create new objects to the model based on the quantity. The object will have geometry, for example representing the area you calculated.
Also, the object has a reference to the original object. This reference can then be used to copy data from the original object to the newly derived object. This way the derived object can know for example the type, location, classification, system and so on it belongs to. Any data. In the case of space coverings, you can copy data both from the space object and the bounding object to the derived object.
After the derived objects have been created, they are just like any other objects in Simplebim. You can enrich their data further just like any other object’s data. And of course, they can be exported to IFC and further used and visualized in the downstream applications.
Derived Object Class
This defines the object class of the derived objects. This configuration only applies, if you have set the Create Derived Objects option. The object class can be any basic object class from the IFC. For example Covering, Beam, Member, Building Element Proxy, and so on… This is also the object class, in which the derived object is exported to IFC. Use the name of the object class as it is written in the Objects palette.
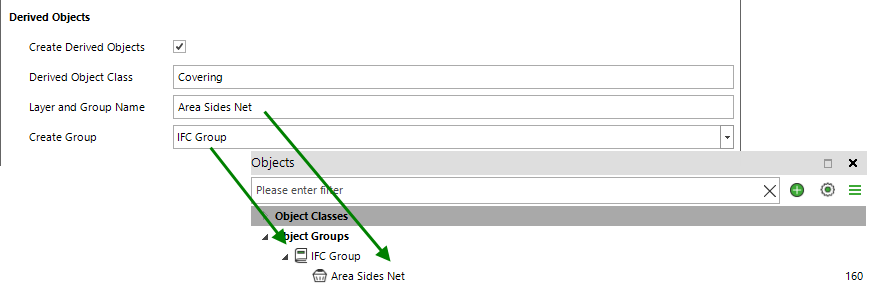
Layer and Group Name
This defines the name of the layer (layer assignment name in IFC), to which the derived object is assigned. The layer name can be something you already have in the model, or you can enter a new one. The layer is a convenient way to find the derived object from the model after they have been created.
If you choose to create a group for the derived objects (with the Create Group option), this is also the name of the group that is created, and that contains the newly created objects.

Create Groups
Turn this option on, if you want to create a group for the newly created derived objects. The group can be either a generic group or an IFC group. A generic group can only be used inside Simplebim. IFC groups are exported to IFC.
This is also a convenient way to find the newly created objects from the model, but also you could feed the group to other tools to further enrich the objects. The group can be used for example as a filter for the copy function when you copy the property data from the original object to the derived one. Or in Calculate Properties tools, to further enrich the derived objects with derived properties.
Calculate Quantities: Volumes – Additional Configurations
Volumes tool only has one additional configuration.
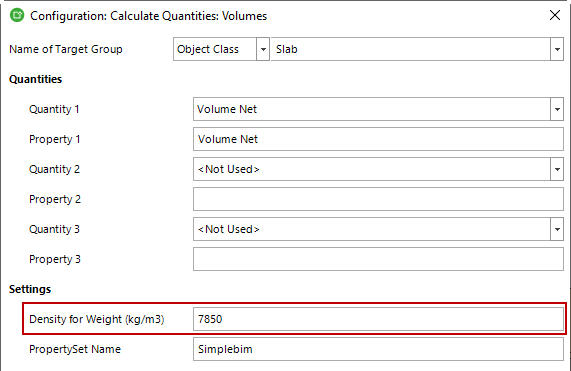
Density for Weight (kg/m3)
This multiplier is applied when you have chosen the ‘Weight’ quantity. The volume net of the object is multiplied by this number to calculate the weight. This a quick way to calculate the basic weight.
If you need more control over how the weight is calculated, then calculate the Volume with the Calculate Quantities tool, and then apply Calculate Properties tool with a specific formula to derive the weight quantity you need.
Calculate Quantities: Dimensions – Additional Configurations
Dimensions tool doesn’t have any additional configurations.
Calculate Quantities: Surface Areas – Additional Configurations
Surface Areas tool has one additional configuration.
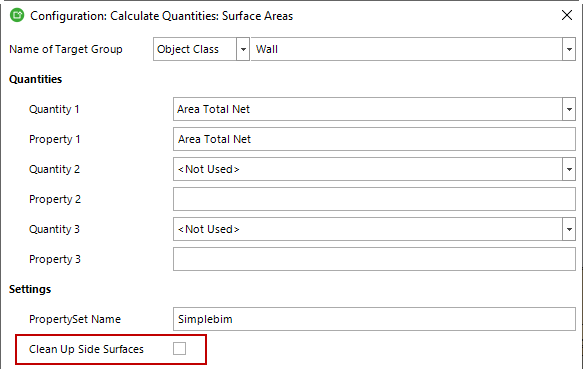
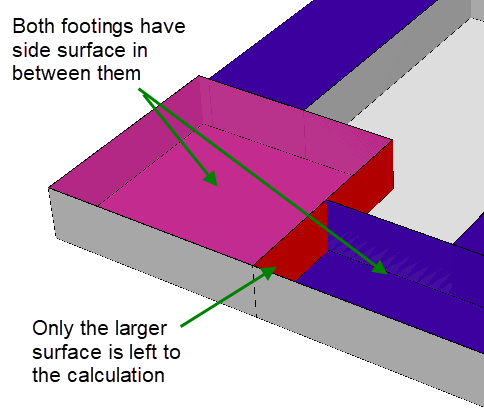
Clean Up Side Surfaces
When calculating Area Side Net or Area Side Gross, you may want to clean up the resulting surfaces, which are overlapping. Calculating formwork for footings is a perfect example of this. For example, a pad footing and continuous footing are modeled with separate objects, and they collide with each other, as they should be in the model. If both surfaces from the collision area are calculated, then you get a too big result, because in the production you don’t build the formwork twice in between the objects. So you don’t want to calculate the area in between twice. The Clean Up Side Surfaces option automatically removes duplicate surfaces from these areas.
Calculate Quantities: Shadow Quantities – Additional Configurations
Shadow Quantities tool has five additional configurations.
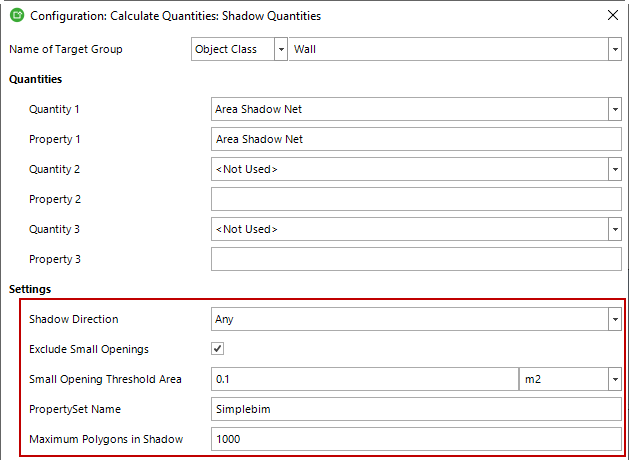
Shadow Direction
Shadow areas are a way to calculate areas from complex geometries. A hollow core slab is a perfect example. It has a very detailed geometry. The area that is used in the production planning or cost estimating is not any one surface of the object, but the projected area of the objects.
By default, the shadow area is calculated from the largest detected side of the building element. This is the ‘Any’ option. However, there can be special situations when this doesn’t give you the correct answer. For example, the hollow core slab could be modeled such that its side has the largest area, instead of the top. And you would want a shadow to be projected to the top and not the largest side. You could then use the direction configuration to make sure you get the right area. In this case, you would use the ‘Horizontal’ option.
Some times you might want to restrict the shadow area to the sides. Then you have two options. The larger or smaller. Choose what serves best your goal.
Exclude Small Openings
Some quantity calculation quide lines require to exclude openings of the specific size from the area calculation. Set this option on, if you want to exclude small openings of a specific size from the areas. This is applied only when you calculate the net areas. The actual threshold is defined in the next configuration.
Small Opening Threshold Area
The max size of an opening that are excluded from the area, if the Exclude Small Openings is set on.
Maximum Polygons in Shadow
This is a technical optimization parameter. You should not have to touch it ever. For very large and complex objects calculating the shadow area might take a very long time. With this parameter, you could set a limit to the processing. If the object has more polygons contributing to the shadow than set here, then its calculation will be skipped and reported as a warning. Usually, you don’t even want to calculate areas for such complex geometries. So this should not be an issue. These might be trees or some special furniture.
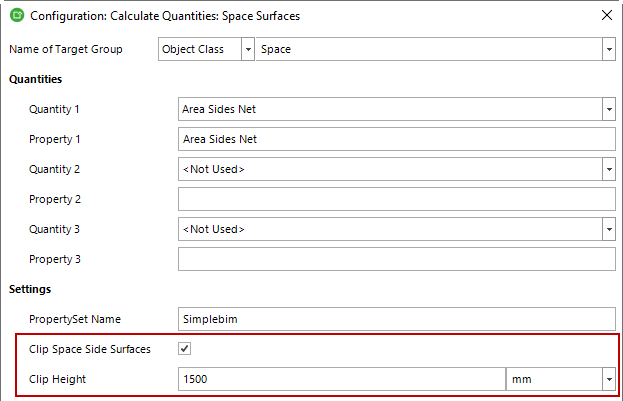
Calculate Quantities: Space Surfaces – Additional Configurations
One of the most advanced features in Calculate Quantities tool is the space surface areas. Space Surfaces tool has two additional configurations.
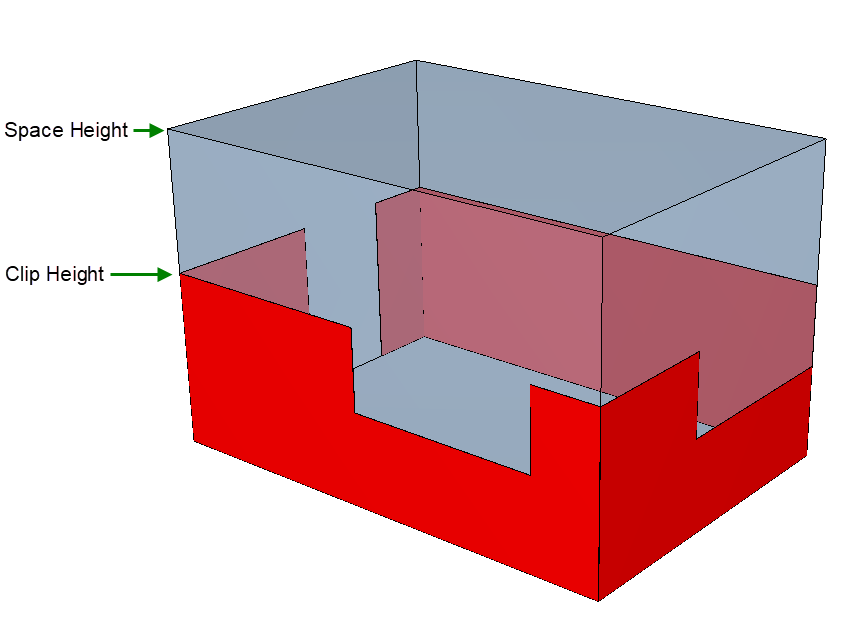
Clip Space Side Surfaces and Clip Height
In addition to just calculating the basic area, with this option, you can decide how the area is limited. For example, if you are calculating the area for a wall within a space, which has tiling only to a certain level, you could limit the area to that height.
The actual height is set with the Clip Height parameter. Note that the height can even be larger than the actual space object. This way you could calculate the area above a lowered ceiling, even if the actual space object has not been modeled that high.
Calculate Quantities: Openings – Additional Configurations
Openings calculate the areas and dimensions of the so called opening elements. These are usually connected to a window or door. So why do you need openings quantities. The very basic need is to calculate dimensions both with and without mouting allowance. See more details from the quantity description.
Openings tool does not have any additional configurations. Note however that you can only calculate opening quantities for objects, which are connected to a so called opening elements.