Create Rule Based Groups
Did you know, that you can create rule-based groups using the Simplebim user interface?
This allows you to automatically classify, filter or group (whatever you want to call it) the building element objects for any number of purposes. Here’s how you do it:
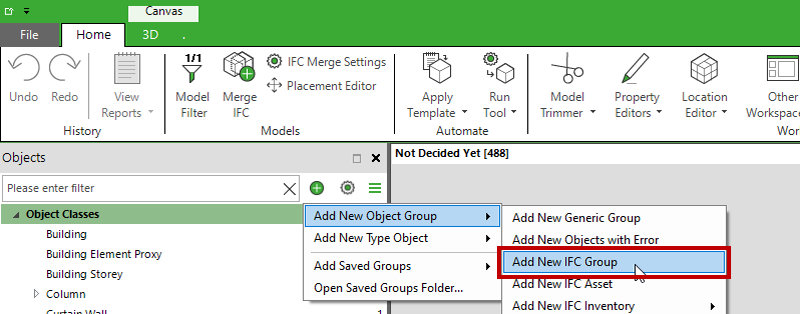
- Go to the Objects palette. Click on the plus icon and select “Add New IFC Group” under the “Add New Object Group” menu.
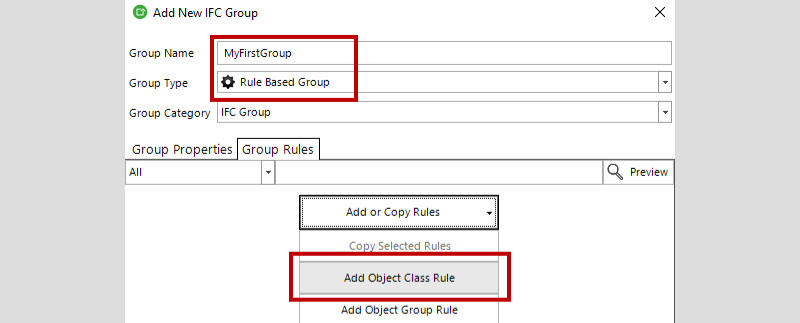
- Give the group a name.
- Change the group type to “Rule Based Group”.
- Go to the “Group Rules” tab. From the drop-down add your first rule. Let’s try the “Add Object Class Rule” first.
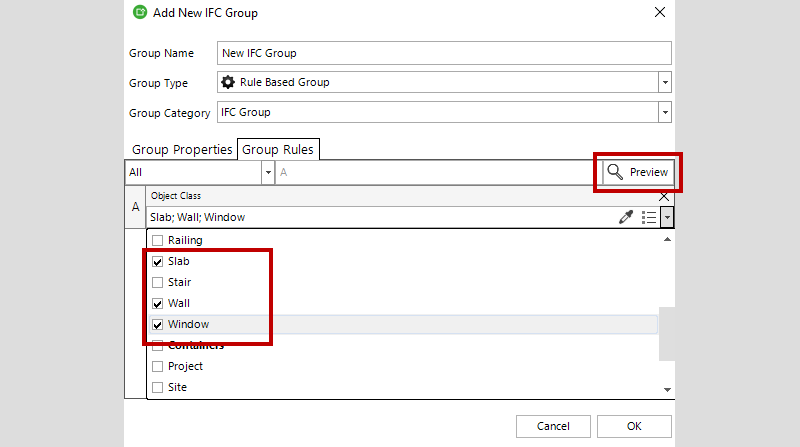
- Select the object classes you want to include from the drop-down.
- Great! You have created your first rule! Click on the “Preview” button and the objects are highlighted in the model. Add or remove an object class to the rule and check the result with Preview again.
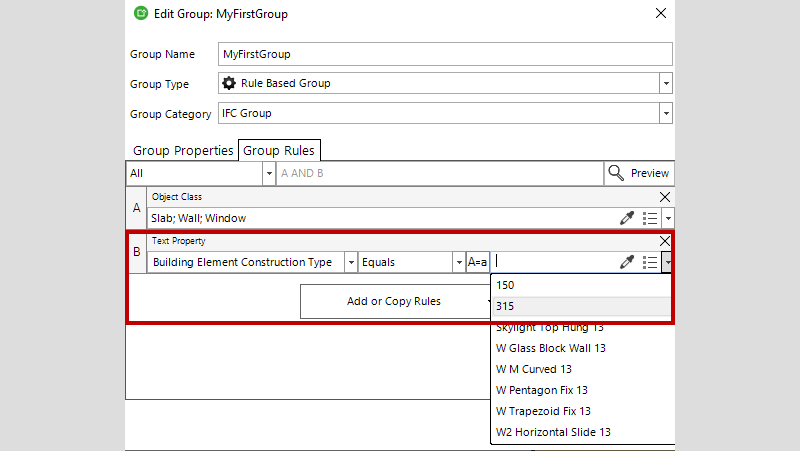
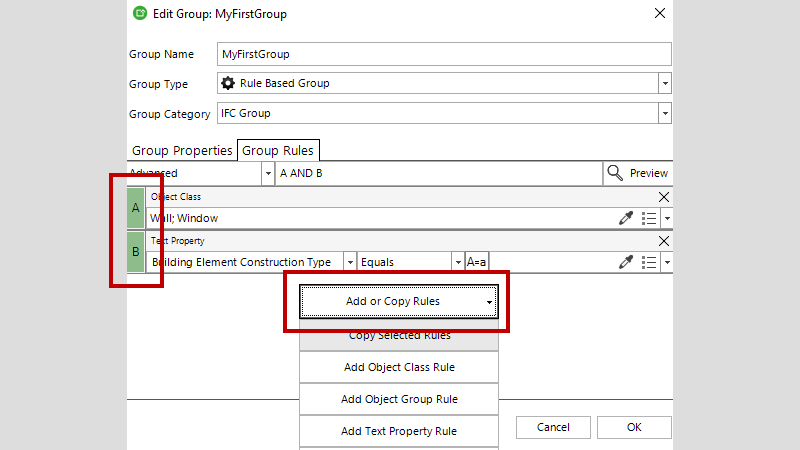
- The rules can be very simple or very complex. Let’s try to make a more complex one. Select the “Add Text Property Rule” from the “Add or Copy Rules” -dropdown. First select a property, for example, “Building Element Construction Type”.
- Select an operator. The default is Equals. Other options include Starts with, Ends with, Contains, and so on… the Like operator allows you to use basic wildcards in your values. For example ‘myvalue*’ or ‘m?value’. Match allows using regular expressions. This is also very powerful but an advanced topic for another how-to.
- Finally input a value. You can type the value or select from the drop-down, which shows the values from the model. Click “Preview” and check if the rule works as expected.
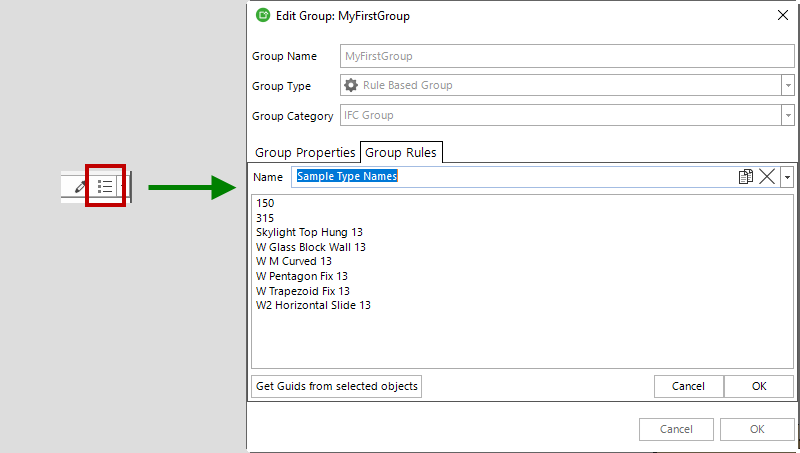
- Many times you want to find objects, which have different values for the property. This is where you can use Lists. Click on the List icon. Type in or paste values to the editor. Each on its own line. To reuse the List later in other rules, give it a name. Click Ok. Again, check the results with the Preview.
- If you create a lot of rules, or want to create more complex rules, it is convenient to use the copy. Select rules from the row title and then select “Add or Copy Rules” from the drop-down. Now you can edit the copied rules. For example, change the object class for the Object Class rule or values for the Text rules, and so on…
- You can delete a rule at any time from the X in the right upper corner of the rule.
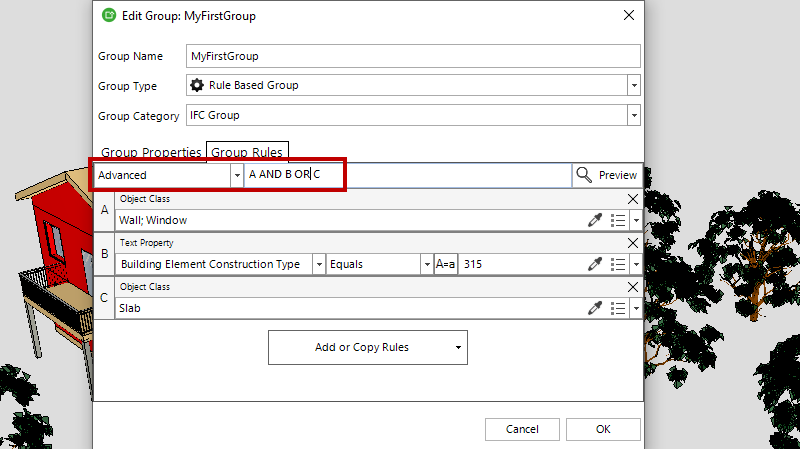
- Most of the time you only need to create very simple rules. However, sometimes you need more complex rules. The default logic, which you already used, is All. Meaning that objects must meet all the rules in order to be included in the group (AND logic). Another basic option is Any. When this is on, it is enough that the objects meet at least one of the rules (OR logic). The Advanced mode allows you to mix these two. For example, let’s change the logic of the rules we created in the previous step so that Walls and Windows must have specific Building Element Construction Type values, but the slabs don’t. So, the logic would be A AND B OR C. You can edit the rule freely, and use brackets if needed, just make sure the rule is valid and uses the identifiers of the rules you have actually defined.
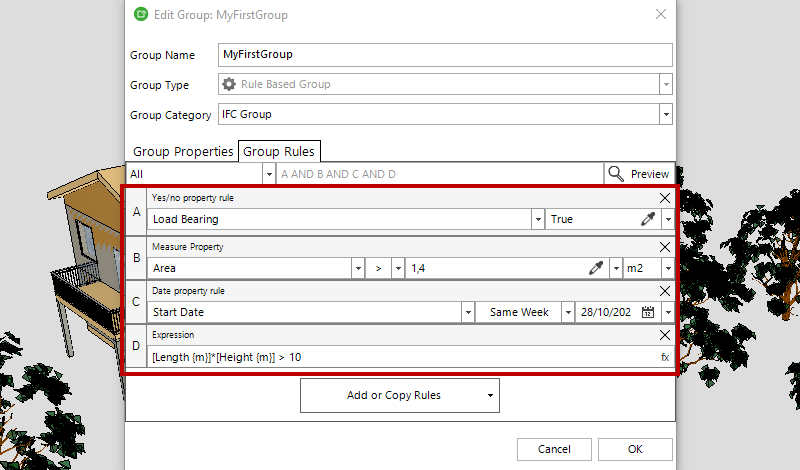
- Now, in addition to the Object Class and Text rules there are different rules for different value types. Numbers, Yes/No, Measure values, Dates, and even Expression rules. Here are a few examples. Note also, that you don’t always have to use the Object Class Rule. Especially if you have made your model consistent first, but that is another story.
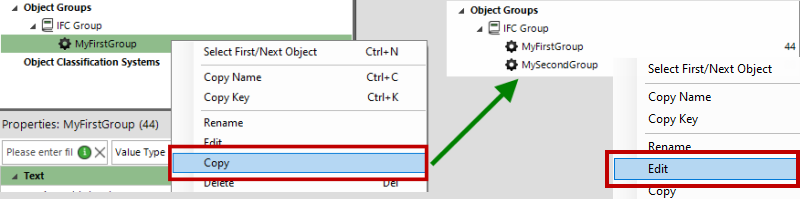
- When classifying the whole model or a bigger subset of the model, many times your different groups have similar kinds of rules. An efficient way to create a set of rule-based groups is to first create one group, then copy the group, and change the rules according to your needs.
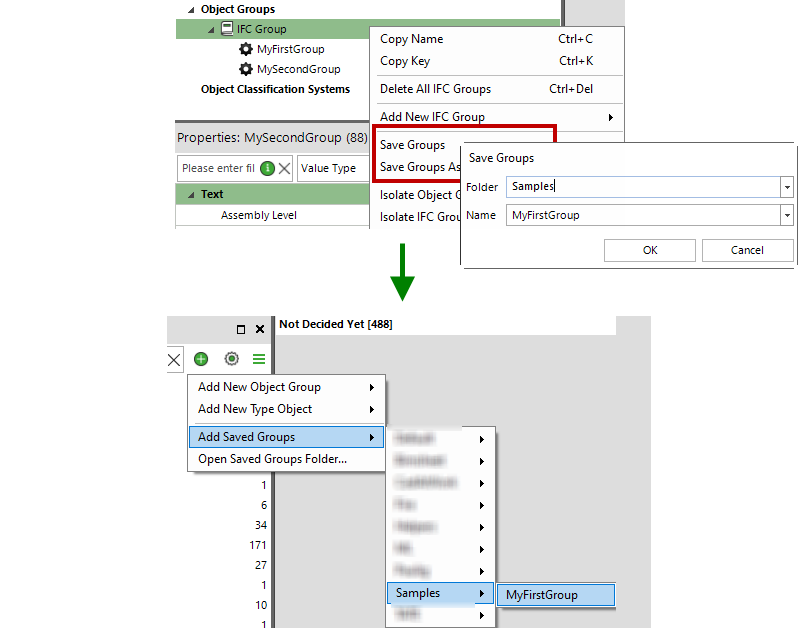
- Finally, one big idea of rule-based groups is to reuse them with multiple models and even in different projects. You can save an individual group or even a set of groups. In the Objects palette right click the Group Category, Parent Group, or an individual group and select “Save Groups”. Select a folder or add a new folder by giving a new folder name. Give a name for your groups, and click “OK”. Now the groups and their rules have been saved to your user profile. You can add these groups to any model from the Plus Icon and select your saved groups under the “Add Saved Groups”. Note that the rules can also be saved to and opened from a file. This way you can share your rules with other users in your organization.
One huge benefit of Simplebim is that the classification and groupings and filters you create are not trapped inside Simplebim, like in so many other open BIM applications. Instead, the groups can be exported to IFC and used in any downstream applications. Just make sure, you create them under an “IFC Group” category as we did in this tutorial.
The groups can also be used in a very efficient way inside Simplebim. For example, you can populate the Table palette or Bimsheet with the help of your groups. Or simply just check and visualize the model in a very efficient way.
Rule-based groups can also be created using Templates. There will be another How-to article about that, but you can get started by following the Template Guide
Okay, that should get you started. Getting automated grouping to work can be very satisfying, save a lot of time and be much more reliable than manual work. Hope you get there. Happy grouping!