Dataflow palette
Overview
With Simplebim you can automate repeating BIM tasks so you don’t have to do the same typing, clicking and dragging&dropping with every model in every project.
In Simplebim the solution for automated BIM data processing is called a Dataflow, which defines is a sequence of steps you take for getting from the starting point to where you want to go. These steps are run in order, which makes the logic of the dataflow easy to understand.
Dataflow -palette
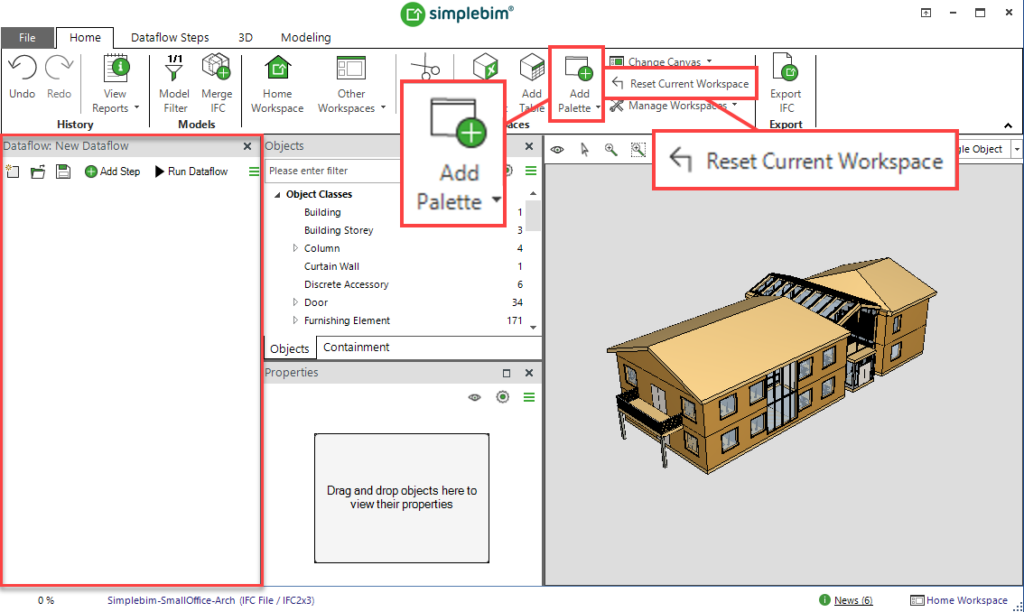
Dataflows are defined using the Dataflow -palette. By default the Dataflow palette is placed on the left side of the workspace, but since it is a palette like any other, you can move it anywhere in the workspace. Some people for example like to have it on the right side instead of the left side. The only difference to other palettes is that you can have only one Dataflow -palette in a workspace. If you close the Dataflow -palette on purpose or by accident, you can always get it back by resetting the workspace or adding it as a new palette from the ribbon.
Dataflow Steps
Simplebim comes with a host of Tools that are the basic building blocks of dataflows. When you add a new step to your dataflow (by clicking on the ‘Add Step’ -button’ or choosing a dataflow step from the ‘Dataflow Steps’ -ribbon tab) you choose which tool the step is using. Alternatively you can use another dataflow as one step in your own dataflow. The definition of a dataflow step typically has two parts: defining the target for the step and configuring the step.
- Target: First you define which objects are processed by the step or participate in the processing. We call this the ‘Target’ of the step. The target can be for example the whole model or an object class, but the most common target is a group of objects you define. This means that knowing how to create groups is an essential skill for defining dataflows. You can get started by adding objects to the Target via drag&drop, but for defining reusable dataflows you need to get familiar with rule based groups.
- Configuration: The configuration of a step is simply some questions you have to answer. These questions are different for each type of step.
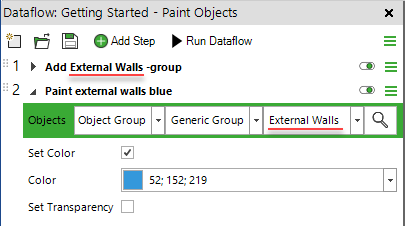
A very simple dataflow could for example colorize all external walls blue. This dataflow would have two steps. The first step would add a ‘External Walls’ -group using the ‘Add or Modify Group’ -tool. The second step would use the ‘Set Appearance’ -tool with the ‘External Walls’ -group as the target and blue as the configuration for the color. The target is always shown with a green background above the configuration.
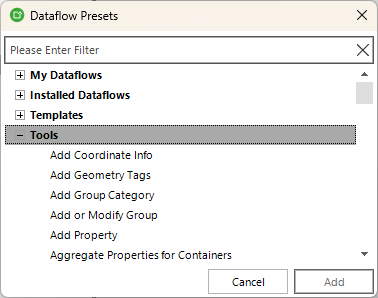
There are 4 different types of dataflow steps you can add to your dataflow.
- Tools are the basic building blocks of dataflows. Tools are software modules that are developed by Datacubist or 3rd party developers and they are installed with the application. Tools essentially define what can be done with dataflows.
- Installed Dataflows are dataflows that are developed by Datacubist or partners. They are packaging a dataflow and provide a target selection and configuration for this package. This means that for you they behave just like tools.
- My Dataflows are the dataflows you develop yourself. These dataflows don’t have a target or configuration and when you add them to another of your dataflows, they are not added as one step like the Installed Dataflows, but each step is added as a separate step.
- Templates are the Simplebim Excel templates from previous Simplebim versions. For backward compatibility these Excel templates can be added as a step into a dataflow.
Managing Dataflows
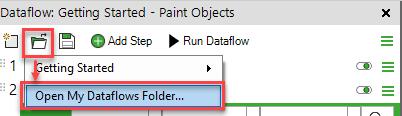
The dataflows you create yourself are stored as files (.sdbf) in your user profile. You can open the folder by clicking on the ‘Open Dataflow’ -button and selecting the ‘Open My Dataflows Folder…’ menu item. In this folder you can have subfolders (one level deep only) and you can manage your dataflows like any other files, for example share your dataflows with others.
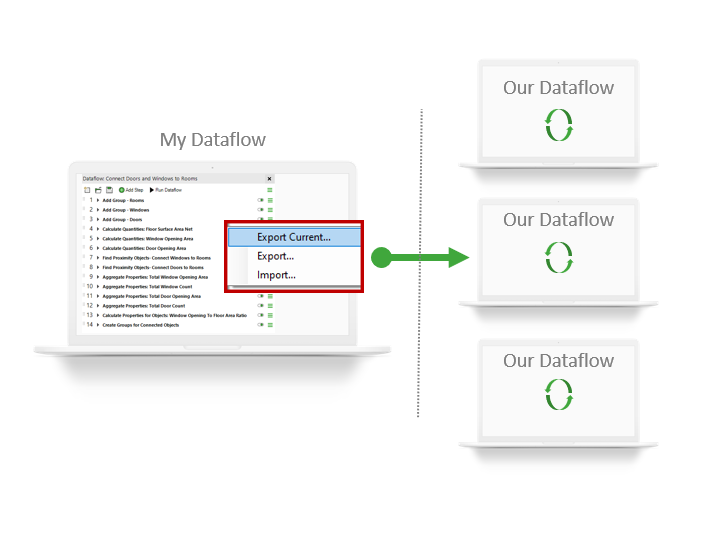
Sharing Dataflows
The whole idea of Dataflows is to automate repetitive tasks – and reuse that automation again and again. Design your Dataflows well, and you can apply them across models, updates, or even entire projects. The more you use them, the more value they bring.
You can export the current or existing dataflow to a .sdbf-file under the Dataflow palette’s main menu. This file can be shared with others just like any other file.
Import is found from the same place. Click import, select the .sdbf file shared with you and the dataflow is ready to be used.