11. Edit Object Colors
You can easily set the color and transparency of objects in Simplebim. When you export IFC, the exported model will have the colors you see in the 3D window. What you see is what you get.
Usually we talk only about color, but since it is also possible to set the transparency we call the combination of color and transparency the ‘appearance‘ of an object.
Setting colors manually
You can colorize objects manually by first selecting them in the 3D window and then setting the color and transparency for the selected objects. You can use any of the methods available in Simplebim for selecting objects and we have a detailed how-to article about how to select objects here.
- Select the desired objects in the 3D window
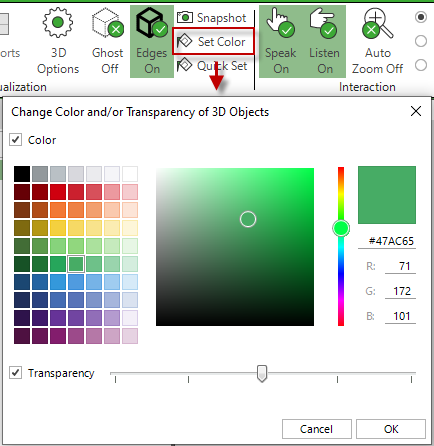
- Click on ‘Set Color’ button in the 3D ribbon tab
- If you want to change the color, check the ‘Color’ checkbox and choose a color
- If you want to change the transparency, check the ‘Transparency’ checkbox and use the slider to set the transparency. Slide to the left to make more transparent and to the right to make more opaque.
- Click OK
Simplebim remembers your latest settings and you can easily apply the same appearance to other objects like this
- Select the desired objects in the 3D window
- Click the ‘Quick Set’ button in the 3D ribbon tab
Automating with templates
While setting appearances manually is useful you will find that setting appearances with templates is the winner. This is because you can set up rules to create consistent color schemes for your models. You can for example give a different color to fresh air and exhaust air systems, to external and internal walls or different kinds of rooms. If you are not familiar with templates, you can find basic information about applying templates here.
- Add a new template
- While you can set appearances by object class (for example give all walls the same appearances), you usually want to set the appearance to a group of objects instead. So the first task is to define a group and you can find more information about how to define groups here. Please note that classification systems and type objects are groups in Simplebim and you can also use them for setting the appearance of objects.
- Once you have your group defined you can set the appearance of the objects in that group. You can find more information about how to do that here.
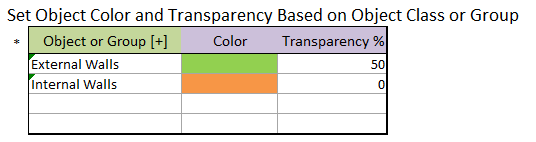
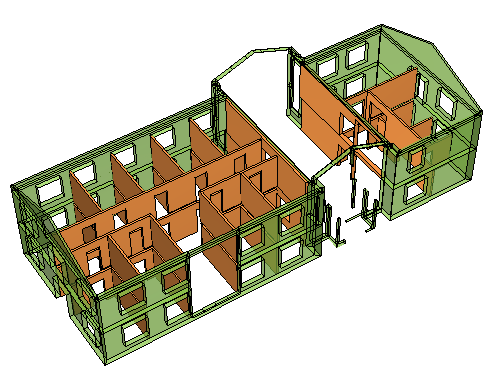
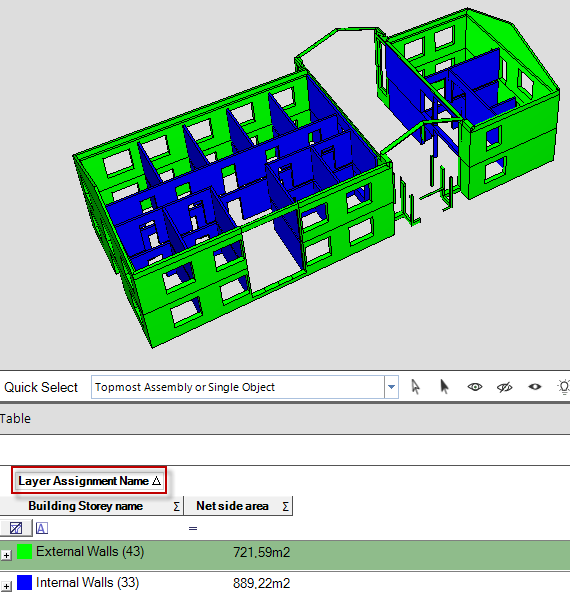
Example: You can download a template that demonstrates this functionality here. For using this template please import our getting started model. The template will colorize the walls in that model based on the Layer Set Assignment -property, such that external walls become green and half transparent and internal walls orange. You can easily adjust this template to work in your use-cases.

Temporary colors
Many of the palettes in Simplebim support colorizing objects based on the information shown in those palettes. This could be by object class, object type, object group, classification, building storey, property value etc. Detailed information about how to colorize objects from palettes can be found here.
Please note that if you export to IFC while the temporary colors are used, the temporary colors will be exported to IFC. What you see is what you get.
Resetting colors
If you want the original colors that you imported from IFC back, you can simply run the Reset Colors -tool.