12. Move and Rotate Models and Objects
Did you know you can move object placements in Simplebim?
Sometimes you need to move and rotate building elements in the IFC model. Here’s how you do it. Manually or automatically.
Manually
- Add Model Placement Editor to your workspace from the Home tab (or you can also open the Placement Editor Workspace). Dock the palette anywhere you like or leave it floating.

- Select objects from 3D. One or more.
- On the Move tab set the coordinate offset. For example, to move the objects 1000 mm up.
- Click Apply. As long as there’s something selected in the 3D, the transformation is done only to those objects. If nothing is selected, then the whole mode is moved. If you have merged multiple models, then use the dropdown to select which one you want to move.
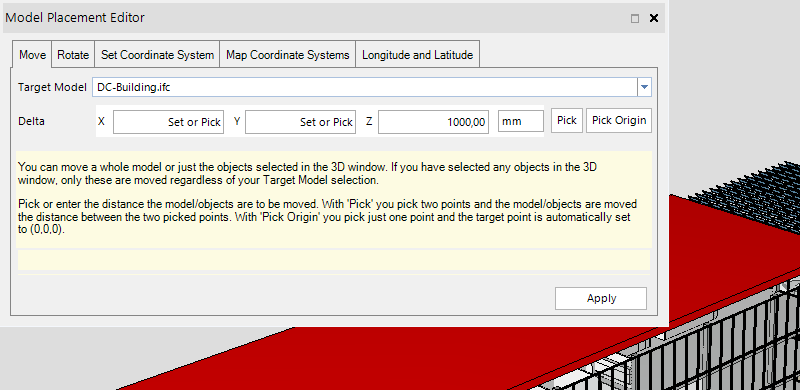
- Note that you can undo the operation at any time from the ribbon Home tab.

- You can also rotate the objects in the Model Placement Editor. This happens on the Rotate tab. Type in or pick the pivot point for the rotation. If you don’t the model is rotated around the model origin, which can lead to unexpected results.
- Next define the offset of the rotation angle in degrees. For example -45 degrees around the z-axis (in other words in XY-plane). Make sure you select the correct axis. Remember, however, that you can undo the operation at any time and try again.
- Make sure you have objects selected from the 3D. Click Apply.
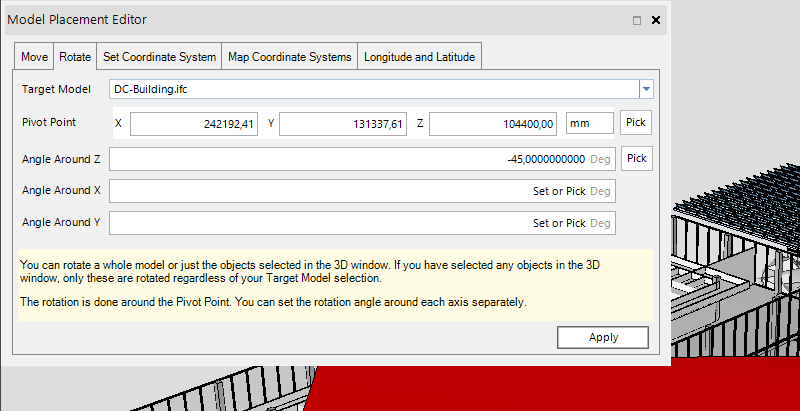
- The objects with their new transformations are ready to be exported back to IFC or simply used inside Simplebim.
Automate
You can run the Move and Rotate tool either from a template or script.
- Create a group and assign the objects you want to move to it. For example YourGroup.
- Create a Template. In the Tools subsection define the tool parameters. For TARGET type in your group name from step 1. TYPE can either be RELATIVE or ABSOLUTE. MOVE_CHILDREN should be off only in special cases. So, leave it ON. MOVE_POINT defines the offset or absolute coordinates. PIVOT_POINT defines the pivot for the rotation if you are rotating. It is not mandatory. If you do, then ROTATEZ defines the relative or absolute angle in degrees. Note you can also rotate around the X and Y axis.
- Save the template and run it to the model, which has your group in it. Let the magic happen.
- Or define these parameters to a script and use the Run-command.

There’s an even more advanced option to use the Helmert Transformation. However, that is another story. You can find its documentation on our Support website.
That’s it. This is how you make your building elements move!