Classify Models
Classifying models adds a lot of value to them. Classifications allow you to quickly and reliably make object selections that are relevant to you. However, when you rely on the classifications it is imperative that the classifications don’t just exist but are also assigned correctly! For this you need the right process.
The term ‘classification’ is used quite broadly in the context of BIM, but in this article it means assigning objects to a hierarchical classification system, such as Unicode.
The optimal classification process is to exchange information needed for classifying objects in the IFC exchange and to classify the model based on this information in the receiving end. This is because you are the best expert for classifying the models exactly the way you need them. Classifying the models yourself is more reliable and efficient than communicating your exact needs to others, checking the result and dealing with the issues that inevitably arise. The optimal process involves 3 steps that are outlined in this article.
- Validating the properties used in the classification (optional)
- Adding the classification system
- Assigning objects to the classification system using the properties from the first step
You can download the sample model and template used in this article here.
1. Validating the classification properties (optional)
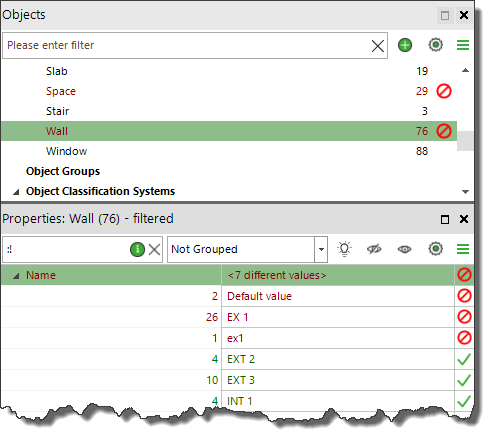
The ‘classification properties’, i.e. the properties used for classifying the objects are part of the BIM requirements. The normal process is to validate that the BIM requirements have been met before using an IFC model. In the classification scenario this is especially important because these properties are used in the rules that perform the actual classification. If these properties have issues, then the classifications will not be assigned correctly.
In Simplebim you can validate that properties have values and that the values are from a list of allowed values or conform to a given pattern. You can learn more about validating models in Simplebim here.
2. Adding the classification system
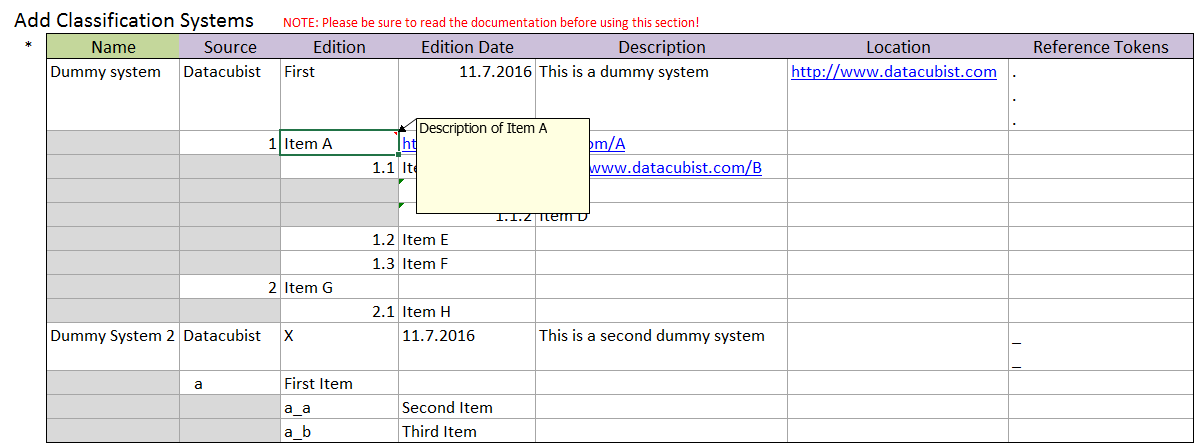
For adding a classification system to your model you apply a template where your classification system is defined. You can find detailed information about defining a classification system here.
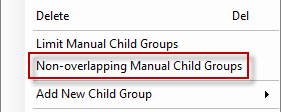
Most often you will want object to be classified only once within a classification system. In order to enforce this you can turn on ‘Non-overlapping Manual Child Groups’ for the classification system. This is done in the Objects palette by right-clicking on the classification system and turning on this feature in the context menu. Please note that this works only with manual groups, not with rule based groups.
3. Assigning objects to the classification system
Adding a classification system adds an empty system to your model and next you need to populate it. Although classification systems are a separate concept in BIM they are handled as groups in Simplebim. This means that you can use all the techniques available for groups also for assigning classification to objects: in Simplebim an object is classified by adding it to a ‘classification group’.
You can add objects to classification groups in two ways
- Manually
- Automated using templates
Classifying objects manually
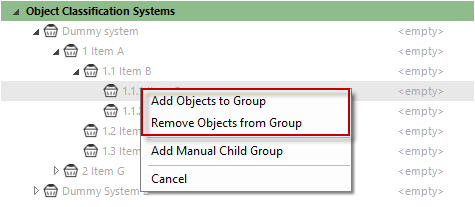
When you are using manual groups you can simply drag&drop any selection of objects from anywhere in the user interface on top of a classification group in the Objects palette. You will be presented with two options; add the objects to the group or remove the objects from the group. You can find more information about creating object selections here.
Classifying objects using a template
When you create a new group in a template with a same name that you have in your classification system, the new group will replace the existing group. This will in effect classify the objects in the new group.

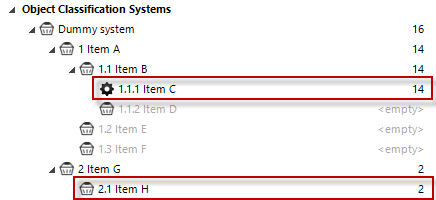
In the example above…
- The Group Name (‘1.1.1 Item C’ and ‘2.1 Item H’) is the name of the classification group that was added to the model when you added the classification in step 2.
- In the example above…
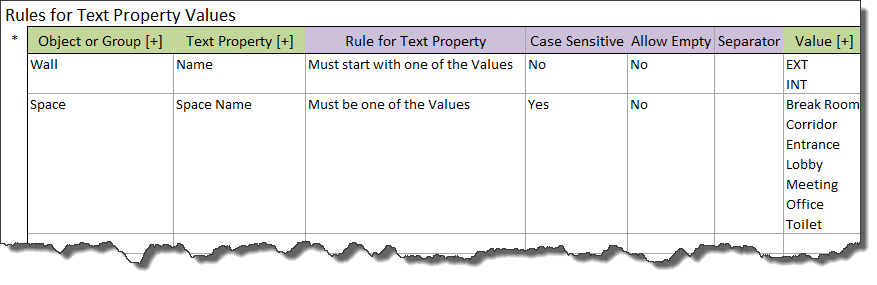
- The first group gets all the wall objects where the value of the Name -property starts with ‘EXT’
- The second group gets all the space objects where the value of the Space Name -property is one of the following: Corridor, Lobby or Entrance
- The Group Type can be manual or rule based. With rule based groups you can look at the rule also in the Simplebim user interface and the group reacts to changes in the model. Manual groups on the other hand are better for performance and allow you to enforce that each object is only classified once within a classification system.
When you apply the template that classifies the objects, you get a result similar to the following:
That’s it. Now that you understand the basic ideas you can try with your own classification system and your own models!