Export Multiple Models
Did you know, that you can export multiple IFC models from one IFC model with Simplebim? And even do it in one go?
There are two ways to do this; manually from the user interface and automatically with scripts.
Export Multiple Models Manually
- First import a model into Simplebim. Note that you can also use a merged model.
- The basic way to create a partial model is to use trimming. You first decide which objects are of interest to you and then export a new IFC file containing only those objects. You can also create multiple partial models in one session. Please check out the dedicated how-to article for how to use trimming here.
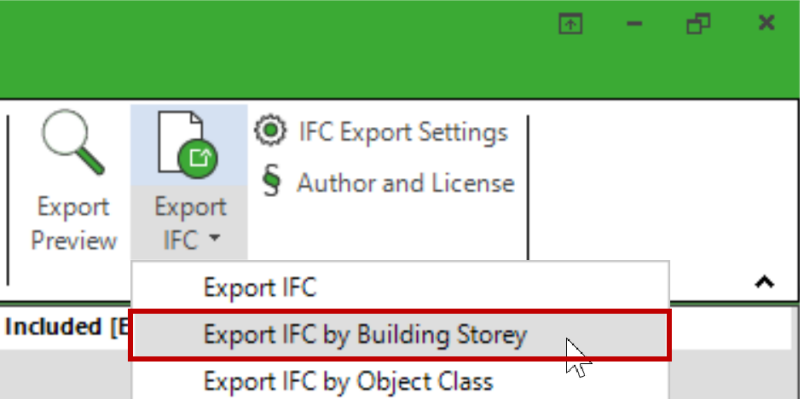
- There are also automated and ready-made options under the ‘Export IFC’ button for exporting multiple models. First, try ‘Export IFC by Building Storey’.
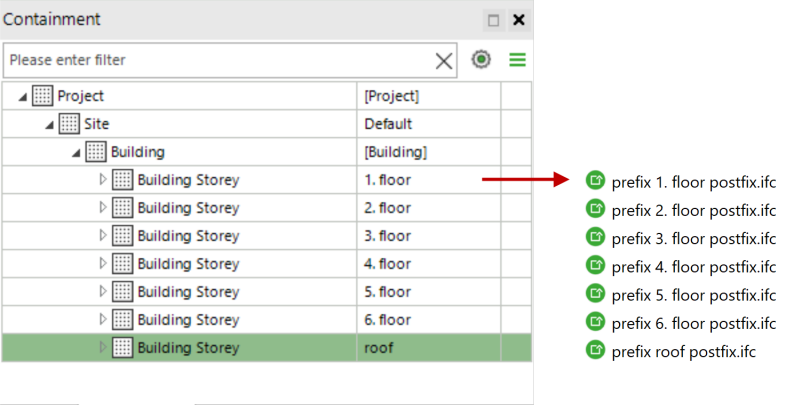
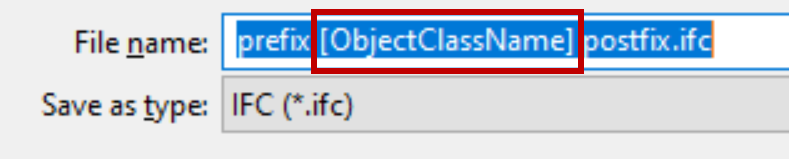
- An export dialog opens. Don’t edit the text between the square brackets. This part of the name is automatically generated. In this case, a different building storey name is used as part of the file name for each exported model. You can freely edit the prefix and postfix part of the name, or leave out one of them or both. Finally click Save and a separate IFC file is created for each building storey, containing only the objects in that building storey.

- Next try the ‘Export IFC by Object Class’. This time the model is split by object classes. Objects from each object class are exported into a separate IFC file. The name of the object class is added to the file names automatically and works with the same logic as the building storey names described above.
- Yet another option is to use ‘Export IFC by Viewport’. If you are new with viewports in Simplebim, you can find detailed instructions for using viewports here.
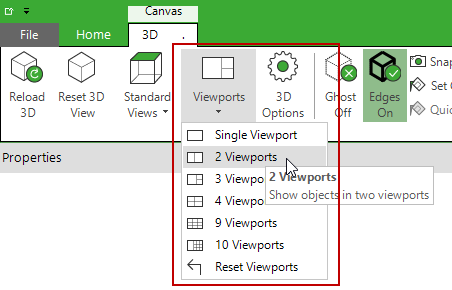
- For using viewports you need to use another workspace than the Trimmer. Switch for example to the ‘Export Preview’ workspace.
- From the 3D ribbon tab select multiple viewports.
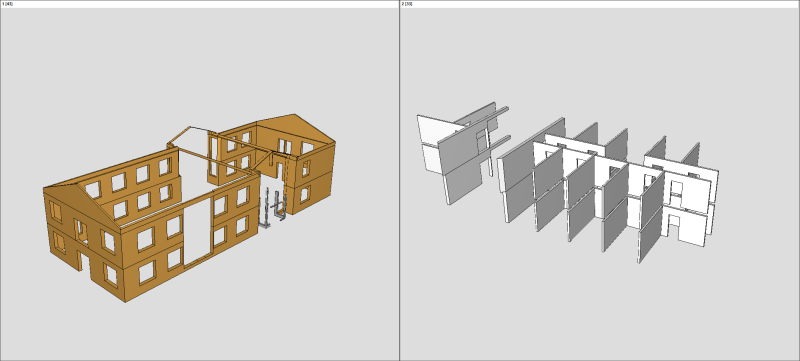
- Now drag and drop objects to different 3D viewports. Your logic can be anything. Use the different ways of selecting objects described here, or simply drag and drop objects within the 3D window. You can use up to 10 viewports. Note that if you only want to handle part of the model, use first the Trimmer to select the objects you want to handle. Here I have first included only walls using the Trimmer and then in the Export Preview, I have draged&dropped external and internal walls into two separate viewports.
- Now select ‘Export IFC by Viewport’. A separate IFC model is created for the objects in each viewport. The number of the viewport is added to the file names automatically and works with the same logic as the building storey names described above.
Export Multiple Models Using Scripts
If you want even more control and want to create your multiple models in a more automated way, then you need to use a combination of a script and a configurable template to do this. Details of this approach are out of scope of this how-to article. However, here are some ideas and examples of how to do this.
If you have first normalized and enriched your model data, then the automation will work better. I’ve seen our customers use this approach, for example, to create separate IFC models for the different sections of the building. For this, you of course need to define the sections first. This can be done with the help of the Location Editor.
In your template you use the following pattern using a configurable template.
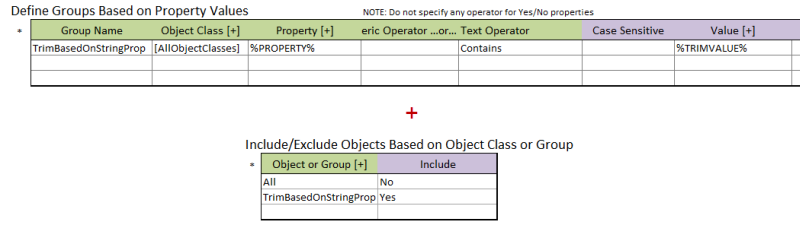
- Define a group that contains the objects you want to export to one IFC file. In this case all objects located in one section.
- Define a trimming rule that includes only the objects in the group defined in the first step.
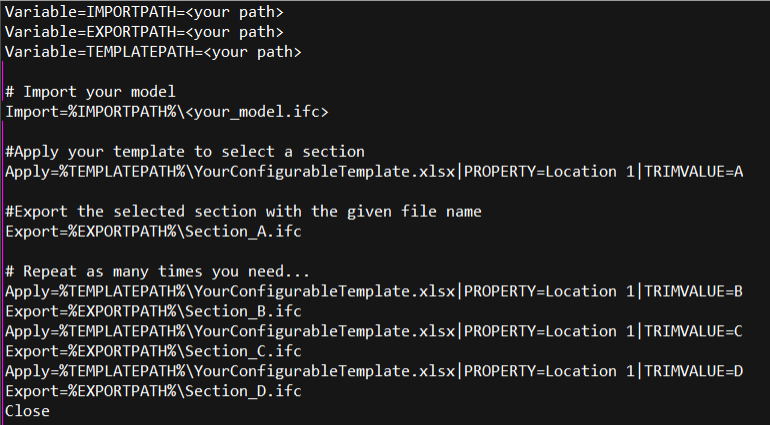
The script would look something like this.
- Import the model with the sections already defined or you could actually also add the locations to the model in the same script.
- Apply the configurable template with the name of the first section. In this example the name of the property containing your section information and the name of the section are variables that are passed from the script to your template. This way you can use the same template for all your sections.
- Export the included objects (=the objects in the first section) into a new IFC file.
- Repeat steps 2 and 3 for each of your sections.
Please refer to other how-to articles, the Template Guide and Simplebim Command Line API documentation for more details. We’ll probably make another more detailed how-to article about this later.
That’s it! Have fun exporting.