Create Your Own Workspaces
Did you know, that you can configure and save your own workspaces in Simplebim?
Simplebim has a dockable and configurable workspace. There are some ready-made workspaces for your convenience, however, for specific tasks, you might want to configure and use your own workspaces. Let’s take a look at how to do that.
So, what can you configure?
There are two things you can configure. First, the layout of your workspace. You can add and remove palettes and arrange them in basically any order or size you like. Second, you can configure the palettes themselves.
There are two kinds of components in the layout. The main area of a workspace is called canvas. In the ready-made workspaces, this is always the 3D window. You probably want to keep it that way. The main purpose of the canvas area is to help the layout to adjust to Simplebim’s window size changes in a meaningful way. The canvas area is the first to stretch.
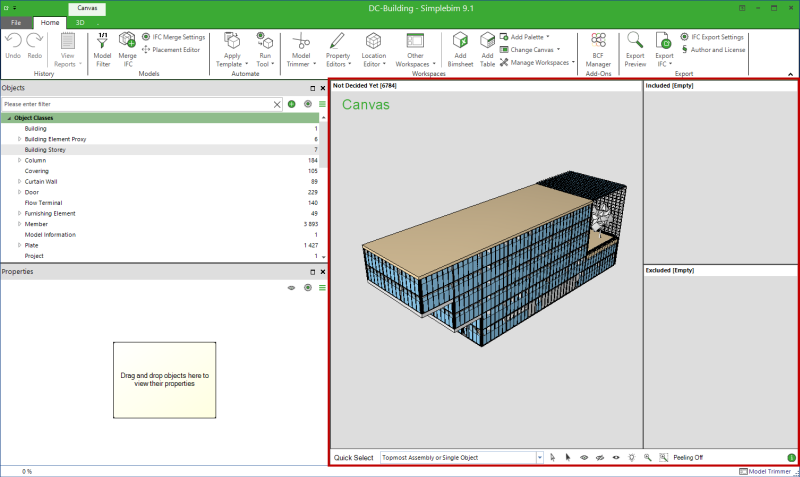
All around the canvas are the palettes, which you can arrange and resize to fit for purpose.
Adding and removing palettes
Any palette can be removed from the workspace by simply closing it from the X button in the right upper corner of the palette.

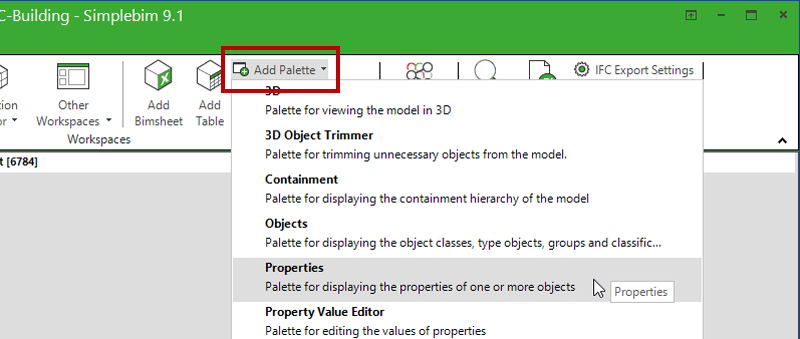
To add a new palette, go to the Home tab of the ribbon, and select a new palette from the Add Palette dropdown.
Now drag and dock the palette from its title bar anywhere you like. The overlayed arrows will show you where you can dock it. Simply end your drag on top of one of the arrows and the palette is placed into the workspace. Drop the palette on top of a square icon, and it will be placed into a tab control with the palettes that already are in that place. Just try it! You can always move the palette to a new place by starting a drag from its title bar again.
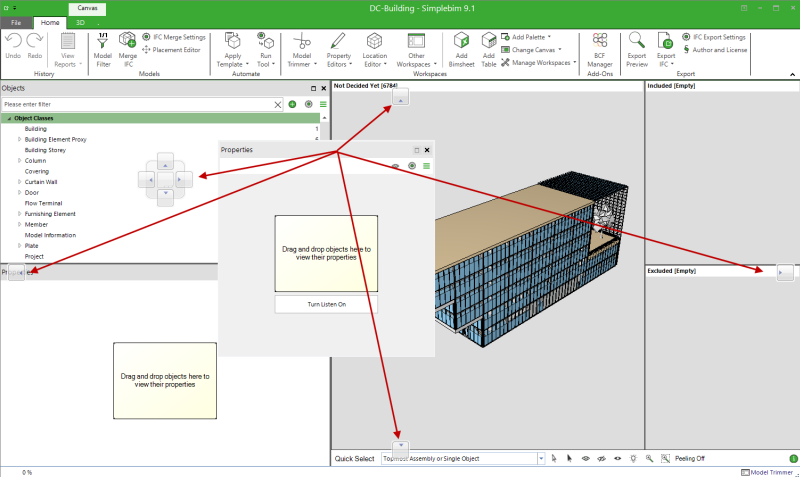
Not that it is possible to leave the palettes floating around and not dock them. However, the un-docked palettes are not saved into the workspace’s configuration.
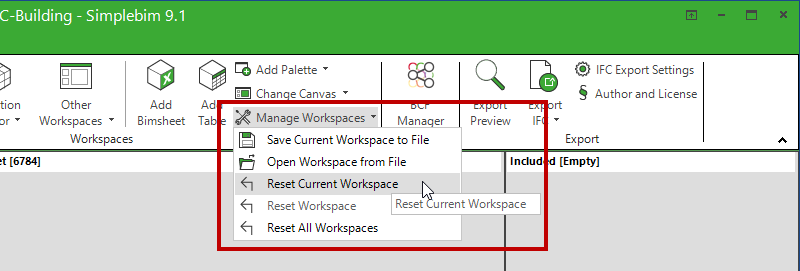
Resetting, saving, and loading your custom workspaces
By default, any changes you make to the ready-made workspaces will be saved. So that next time you open Simplebim and the workspace in question, it will be configured the same as you left it the previous time you used it.
If you want to reset the workspace to its factory defaults, go to the Home ribbon tab, from the Manage Workspaces dropdown select either Reset Current Workspace, or All Workspaces or choose the one you want to be reset from the Reset Workspace list.
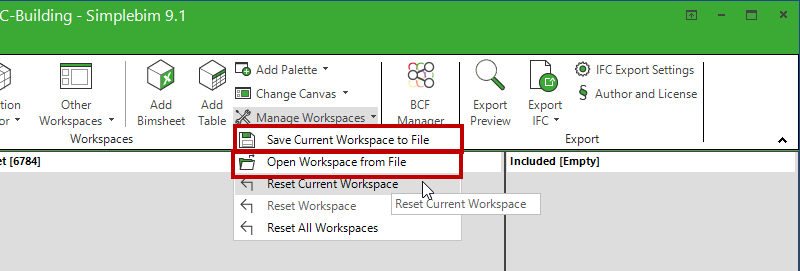
To save your own workspace to a file, select Save Current Workspace to File. Browse to a folder, give the configuration a name and click save. To open a saved workspace click on the Open Workspace from File, browse, select a configuration file, and click open.
Configuring the palettes
Whenever a workspace is saved, either automatically or explicitly by you, two things are saved: the layout as we already learned above, and also individual palettes’ configurations.
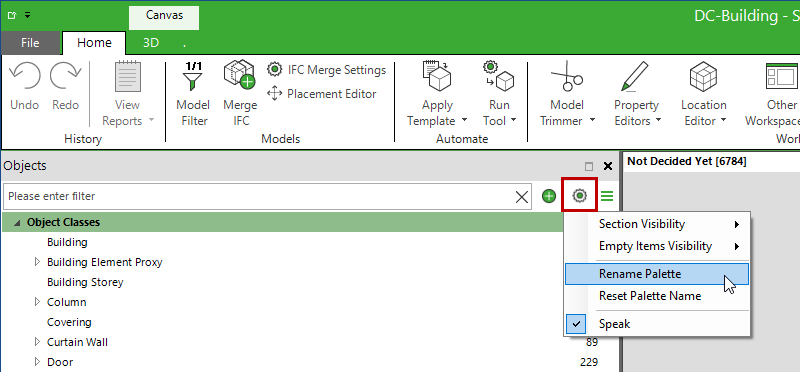
Each palette has its own settings you can configure and save. The main rule is, that everything that is under the settings menu button will be saved. For example in Objects palette:
In addition to this, also some other palette-specific configurations are saved. For example, in the Properties palette, the search box will remember the last search the next time you open the workspace. In the Table palette, the whole layout will be remembered. Even the content of the Table palette can be automatically retrieved. If you rename an Objects palette, this will also be remembered.

Special workspace called Trimmer
There are two kinds of ready-made workspaces in Simplebim. The default workspace is called Trimmer. In this workspace, everything from the model is always shown. All the objects, groups, the whole model tree, and properties.
If you exclude some of the objects or properties in the Trimmer workspace, then the other workspaces, which only see the included objects, will only show the included objects and properties, and so on…
Your own workspaces will behave accordingly, depending on which kind of ready-made workspace yours is based on: Trimmer or some other.
Use case tips: Using multiple Object palettes
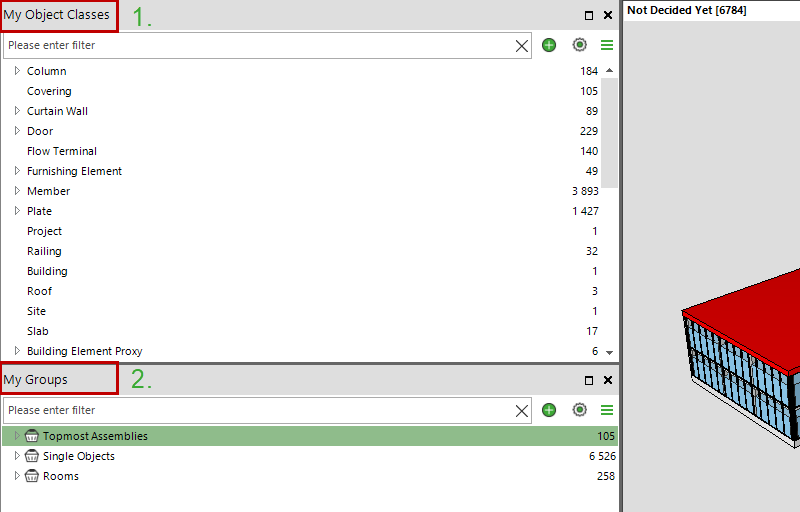
Here I have added two Objects palettes to the workspace, isolated object classes to another one, and IFC groups to another one. Also, I have renamed them accordingly.
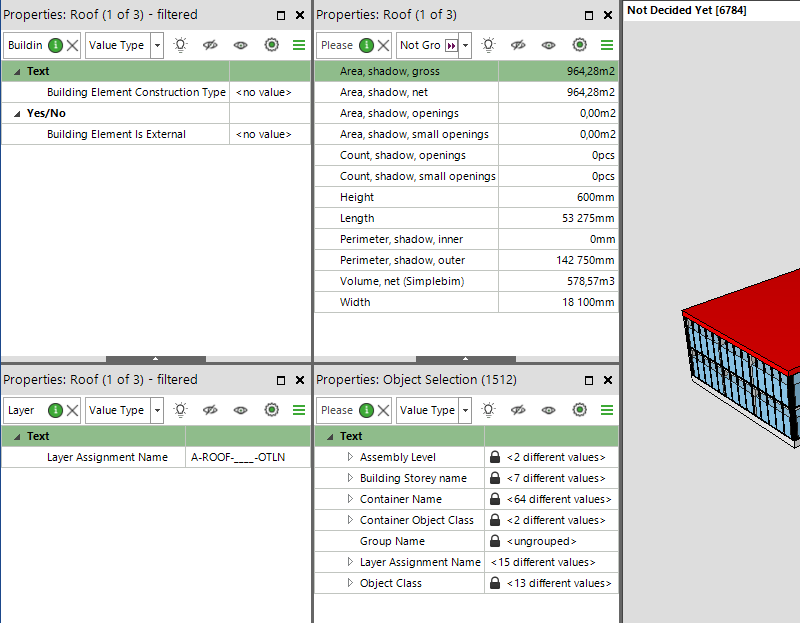
Use case tips: Using multiple Properties palettes
Here I have added four Properties palettes to a workspace. (We call this the Janno style according to one of our power users). Each one is showing different data. The first one is showing only some identification info with the help of the search box filter. For the other one, I have isolated the basic quantities property set to show only quantities. The third one is showing layer info. And the fourth one is showing all properties of all of the objects. The first three palettes react to the selections in the 3D. The fourth one is always showing all the data.
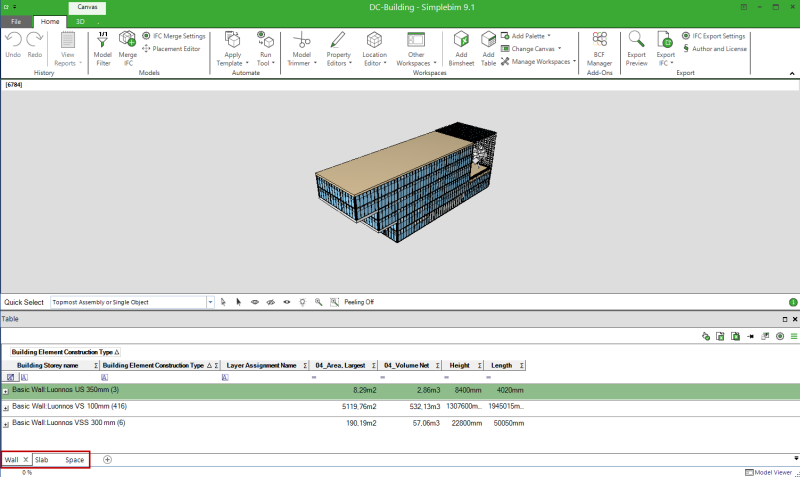
Use case tips: Using multiple tabs in a Table palette
Here I have a workspace based on the Export Preview workspace. It only has 3D and a Table palette in it. The Table palette is configured such, that it shows data from different Object Classes in each tab. I have predefined the properties shown in each tab according to the use case. The properties are grouped to fit the purpose. Even the summaries are already calculated. You could have a workspace for each of your use cases. Note however that in the Table palette, you can also save and open the Table configurations separately. Whether you choose to save the configuration to the workspace or separately, depends on the use case.
Hope this will get you started and inspire you to configure your own workspaces. Have fun!